Transfer photo on Wood?
Knowing how to transfer images to wood gives us a wide range of possibilities for our crafts. With this technique, you can realize original arts & crafts based on photographs that remind us of special occasions that we don’t want to forget.
- Here are the most important tips to keep in mind for this technique:
- Choose a good photo to transfer and print it with laser ink.
- Apply photo transfer gel or podge on the wood.
- Place the photocopy face down on the wood.
- Leave to dry the gel photo transfer 24 hours.
- Once dry, spray water on photocopy paper.
- Use sponge to remove paper (not ink).
- Our photo is already printed with toner in the Wood!
You already know the tips to enjoy with this great technique and create nice crafts for your memories. Cheer up and try it, you sure like the result.
Sit back, relax and enjoy a sunset
Do you dare with the technique of Photo transfer?
With this simple decoration you can enjoy and experience step by step an easy way to transfer images to Wood.
How to transfer images to Wood?
Well … with a product to transfer images, such as the gel Photo Transfer or podge.
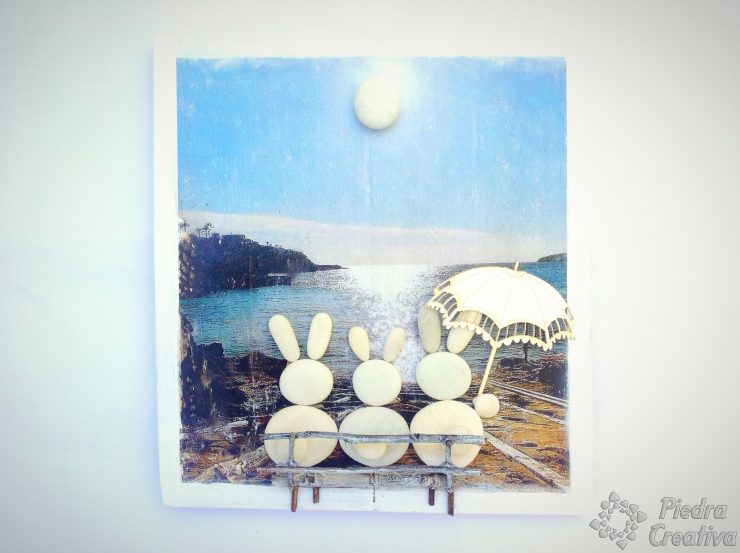
At this moment, the spring begins, the good weather arrives, the sun shines for more hours and the wonderful sunsets return. So, we thought of showing you a picture of one of those beautiful moments of sun accompanied by some funny bunnies.
This photograph has been gift to us by a most beloved and wonderful person. She did it on a little trip she made to Ibiza. Many thanks ♥ Aintzane ♥ for your contribution! We hope you like.

For these crafts we have used:
- White and round stones of different sizes
- 2 pieces of pallet wood
- Sandpaper
- White paint
- Sealant and solvent
- Brush
- 1 photocopy of the photo
- 1 bottle of gel photo transfer
- Water and sponge to rub
- Stone glue
- Varnish
Steps to transfer images
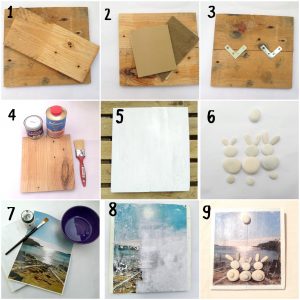
Before we start we choose the stones and see how we would like it to be the final result.
To begin with, you will need to sand the two pieces of Wood
To join them, we used plates and contact glue.
Once you have sanded the wood, put a sealant to make it look better and let it dry for a few hours.
Then paint the wood in white with the acrylic paint. If you need a second coat, let it dry very well between coat and coat. If the wood is perfect, the photo transfer product can be applied directly to the wood (this will be done in another manual).
To apply the technique of the Photo Transfer I recommend that the white painted wood be very dry (about 24 hours).
Choose a photo with very good quality and cut it to the size of the base.
And how to transfer the image?
The photocopy that you are going to use must be laser printed on plain paper we have used a photocopy of A4 size but will depend on the base of your choice.
Important: If you want the image to look the same as in the photograph, you have to print it backwards and there is the mirror effect: When applying the Photo Transfer product, the photocopy must be put down in the wood so that the direction of the photograph changes. So, do it this way if you want the image to be printed in the same direction as you did it.
When you have the wood ready, apply with the brush a layer of the Photo Transfer product on both the wood and the part of the image. Once done, join these two parts on the same side on which the gel has been applied.
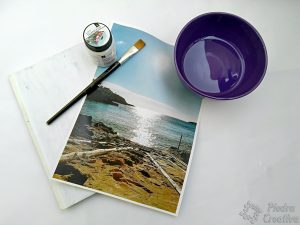
Make sure you have covered the photo transfer gel very well in the corners.
Leave to dry well another 24 hours to get a good result.
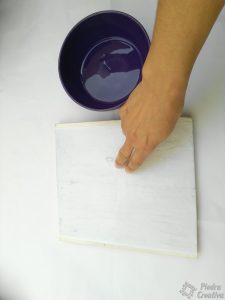
When it is very dry, with water and with the fingertips or with a sponge, rubs gently to remove the paper. That way you will discover that the image is transferred to the wood. Do it slowly to remove the paper and not the ink. At first, you will appear a little white but do not worry, with the acrylic varnish you will be perfect.
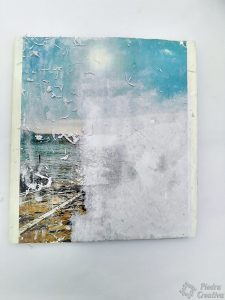
Then we paint the wood with acrylic white paint and thus we retouch the imperfections.
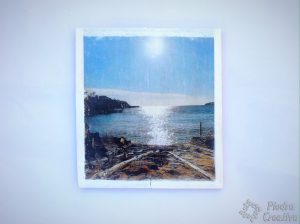
Final details for the Photo Transfer
To finish with the base of our DIy, we have applied another layer of the same product Photo Transfer or, if you prefer, you can apply varnish.
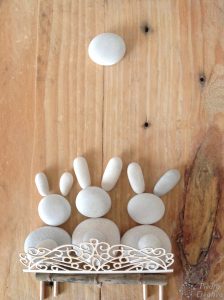
We, to apply our personal details, we have added some white stones adding a few bunnies.
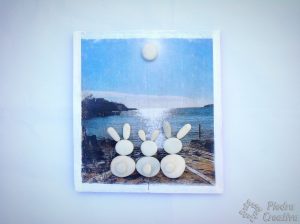
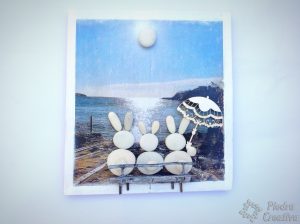
We hope you enjoyed this fun DIY with stones and that you have learned a bit more how to transfer images in Wood.
In the next articles we will teach you new tips. Some tips to paint stones really are very useful and will help you to create much better your own creations.
See you soon! Kisses ♥♥♥
He who learns and learns and does not practice what he knows is similar to one who plows and plows, but does not sow” – Plato
Learn an enjoy with PiedraCreativa



Añade tus comentarios